# Integrating With Google Assistant
### Objective
This document will help you set up a dialog flow agent (equivalent to Alexa skills), connect the agent to a configured App in ixHello, connect the Google Agent to the ixHello App, and use the agent via voice interaction on the Google Assistant app.
### How it works?
1. Set up App in ixHello.
2. Set up Agent in Dialog Flow.
3. Manage integrations in Assistant App (configure if the app uses account linking, skill. invocation, publishing on Google Play Store).
4. Integrate/connect agent with the ixHello App.
### Setting up App in ixHello
1. Set up your app in ixHello. You can also import the [following template](https://demovideo.s3.amazonaws.com/Product+Lookup.json) and create an app using the given template. Please follow [this document](https://docs.ixhello.com/ixhc/apps/app-export-and-import-q-and-a-app-survey-app) to create an App from the given template. Note: You need to make a slight change in the publishing step.
### Setup Agent in DialogFlow (DF)
Users can connect apps built in ixHello to agents in Google Assistant. After setting up the App in ixHello, users need to set up an agent in Google Dialogflow. Please follow the following steps.
1. Go to
2. Sign in with your Google account
3. Click on **Create Agent**. Provide the **Agent Name** and Click on **Create**. The agent’s name cannot contain whitespaces. If you have an agent already, click on the drop-down and select the agent.

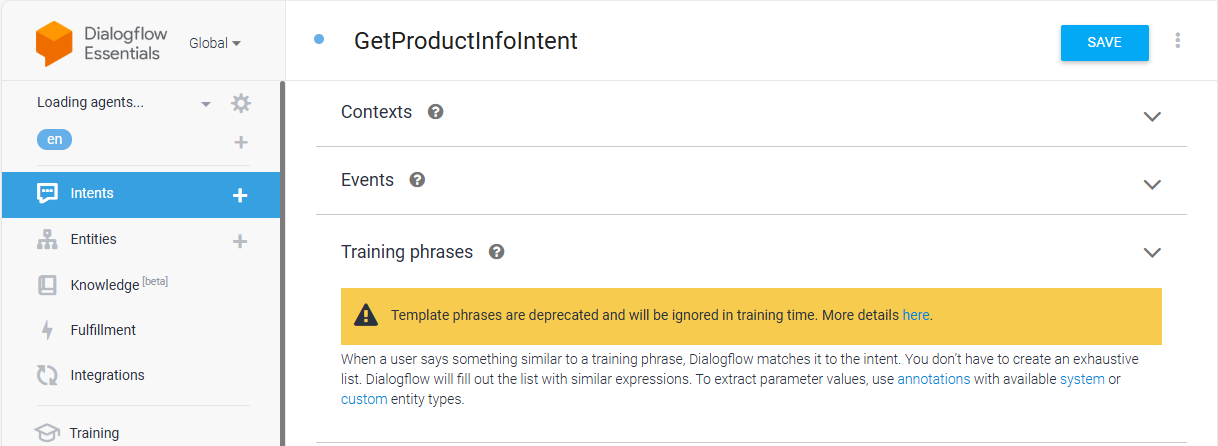
1. Create Intent. On the left menu, click on **Intents** and then click on **Create Intent**.

1. Provide the following details:
1. IntentName: GetProductInfoIntent (same as the intent name in ixHello)
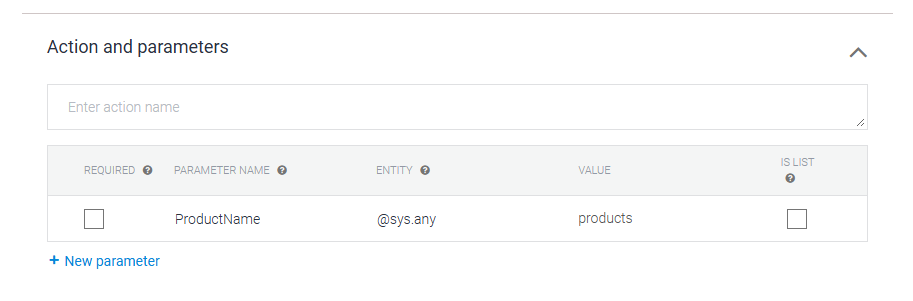
* Action and Parameters: For intents that contain parameters (corresponding to Slots in ixHello), provide the parameter details. The parameter name shall be same as the slot name in ixHello. Provide the entity type as @sys.any. You can select from the available entity types as per your parameter type or also create custom ones.
* The user can also set the prompt message to ask the user input for the parameter value. Click on the prompts section and provide prompt messages.
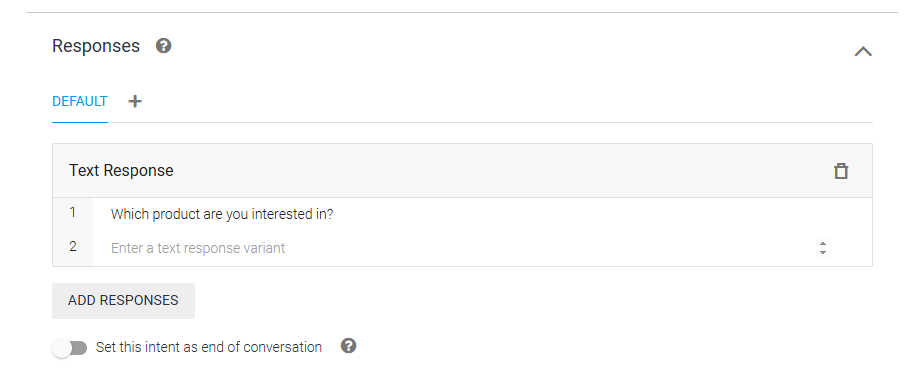
* Open **Responses** and create a default Text Response
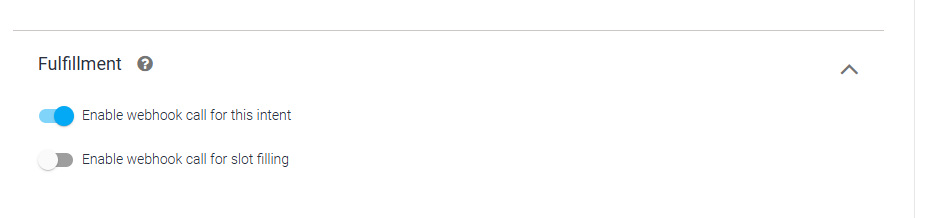
* Scroll down and expand the Fulfilment Section. Click on **Enable Fulfillment**.
* Turn on **Enable webhook call for this intent**
* Click **Save**.
* To set up webhook, click Fulfillment on the left navigation. Enable the Webhook toggle. Then provide the URL to ixHello: ****
Depending upon where your App is located in ixHello, provide the following URLs:
Development/ Staging: ****
Production/ Live: ****
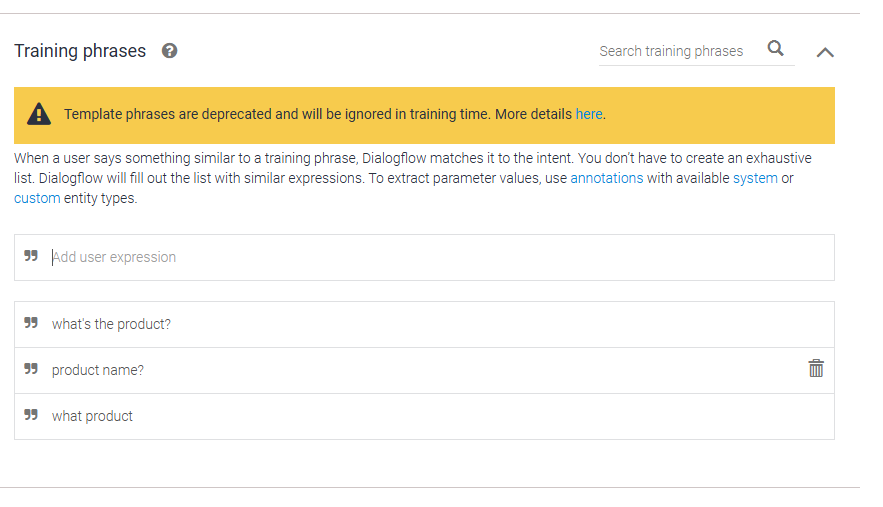
1. For testing the agent, use the **Try it now** section on the right side. Enter a training phrase you set up earlier, i.e. *what product*
Provide the product name value as ‘*apple watch’* after the agent asks for product name and you shall be able to get the following response.

1. The agent has been tested successfully.
### Integrations
Depending upon whether the ixHello App requires account linking or not, you can set integrations on Google DialogFlow. For the purpose of this demo, we proceed with Integration without account linking.
### Integration Without Account Linking
1. Click on the Integrations menu, and then on “Continue with Integrations” on the main screen.

* On the resulting screen, ensure that “Sign in Required” is unchecked and click on Manage Assistant App.

* Now to test the app, let’s link the assistant with ixHello agent.
### Connect Dialog Flow Agent with the ixHello Skill
1. Go to the Dialog Flow page, click on the gear icon as shown in the image, and copy the project ID in the resulting screen.

* Go to the ixHello platform, on the left navigation, click “Custom App” -> “Manage Apps” then hit the select button for the app you set up in step 1. Then Click on the Publish tab.

* If the profile for the ‘Google Assistant ’ channel is already set up, click on Edit and update the Google Project ID.

* Else, Add New Publish, and on the resulting dialog, make sure the Channel is set and “Google Assistant” and paste the Google Agent ID that was copied from the Dialog Flow screen to the “Google Project ID” text box
* Click “Save”.
### Test the DialogFlow Agent
* On the integrations, click on “Continue with Integrations”, Click on Test on the resulting tab.

* You will be redirected to the Google Actions Console. On the Test tab, enter Talk to Product Lookup. “Talk to Product Lookup” shall be auto-generated.

* Provide the training phrase set up in step 6.b. Then continue.

The successful dialog flow looks something like the screen shown above. The assistant is deriving results from its integration into the ixHello App.
### Integrate With Account Linking OAuth
For this step, you first need to gather the ClientId and Client Secret.
### Get Credentials for Web Service:
### Use the following steps below to set your Client ID and Secret
* Go to
* On the navigation go to API & Services then select "Credentials":

* Download the JSON for the OAuth2 Client (Web Client) into a secure place and copy the ClientId, Secret, Token URL, and Auth Url from the JSON file.


**Note:** Skip this step if you have followed the Setup without account linking step above.
### Setup Account Linking
1. Click on integrations and select “Continue with Integrations” on the main screen.

2. Select Google Assistant and click Integration Settings in the GA Card, if the skill requires account linking select the Sign-In Required Option on the Welcome Intent.
3. Select the Manage Assistant app to set up the OAuth
4. In the Manage Assistant APP console, select Develop -> Account Linking
5. In the Account linking screen use these options for the OAuth configuration
* Account Creation -> Do you want to allow users to sign up for new accounts via voice? – **NO**
* Linking type: OAuth, Authorization Code
* OAuth Client Information
* ClientId – From the previous step
* Client Secret – From the previous step
* Authorization URL-
* Token URL -
* Testing Instructions: Your ixhello registered email.
You can now test the bot and you shall receive the following output.
### Publishing the Project
1. Click on “Integrations” in the side menu and select “Continue Integrations” in the resulting modal.
2. Click on “Manage Assistant App”
3. In the “Quick Setup” section, click the “Decide How Your Action Is Invoked”
4. Set the Display name
5. Click on deploy.
6. Fill in the following fields:
1. Description: Short and full description
2. Images: 2 images but only the small Logo image is compulsory. The large banner is optional. The large banner should be 1920 x 1080 px
3. Privacy and consent: Privacy is compulsory but the terms and condition URL is not compulsory
4. Contact details the developer email and name: email should be an active email
5. Additional information: fill in all fields that apply
These fields are mandatory and the information provided here should reflect the assistant and your company. Missing out these fields might cause issues while trying to release the app.
1. Click **Save**
2. Go to Company Information and fill in the following fields
1. Company Contact
2. Developer Contact
3. Go to brand verification and follow these instructions from Google to verify your
4. Click **Release**.
5. Select the Alpha Release tab in the resulting pane and click **Manage Beta Testers**
6. Type in the email address of your beta testers, click on the “**+**” sign, and click **Save**. \
**Note:** Emails should be a valid Google account
7. Click **Save** then click on the back arrow button in front of the “Whitelist alpha testers” label to go back to the Manage Releases page
8. On the Manage Release page, click the “Create a Release” button.
9. **Note:** It takes between 30 minutes to 4 hours to get a response on the release request. If there is any issue on the release request, the necessary information will be shown on this Google Actions console page.
10. Click on **More info** to see the details of what needs to be fixed
11. **Note**: The privacy policy is a very common cause of Google's declining releases. It must conform to the following:
1. The URL must link to a valid website containing a privacy policy specific to your Action.
2. It must be a public document that discloses how your Action collects, uses, and shares user data, including the types of parties it is shared with.
3. It must be available for Google crawlers to access and scan the content of the privacy document.
4. It must also be written in each of the languages for which your Action is enabled.
5. It must contain any of the following:
1. Action Name:
2. Company Email:
3. Developer Email:
6. Please see for more information.
### Test the project
1. Launch Google Assistant on your mobile
2. Say “Hey Google talk to product lookup”